

How to setup a robot in the cloud with Amazon Web Services
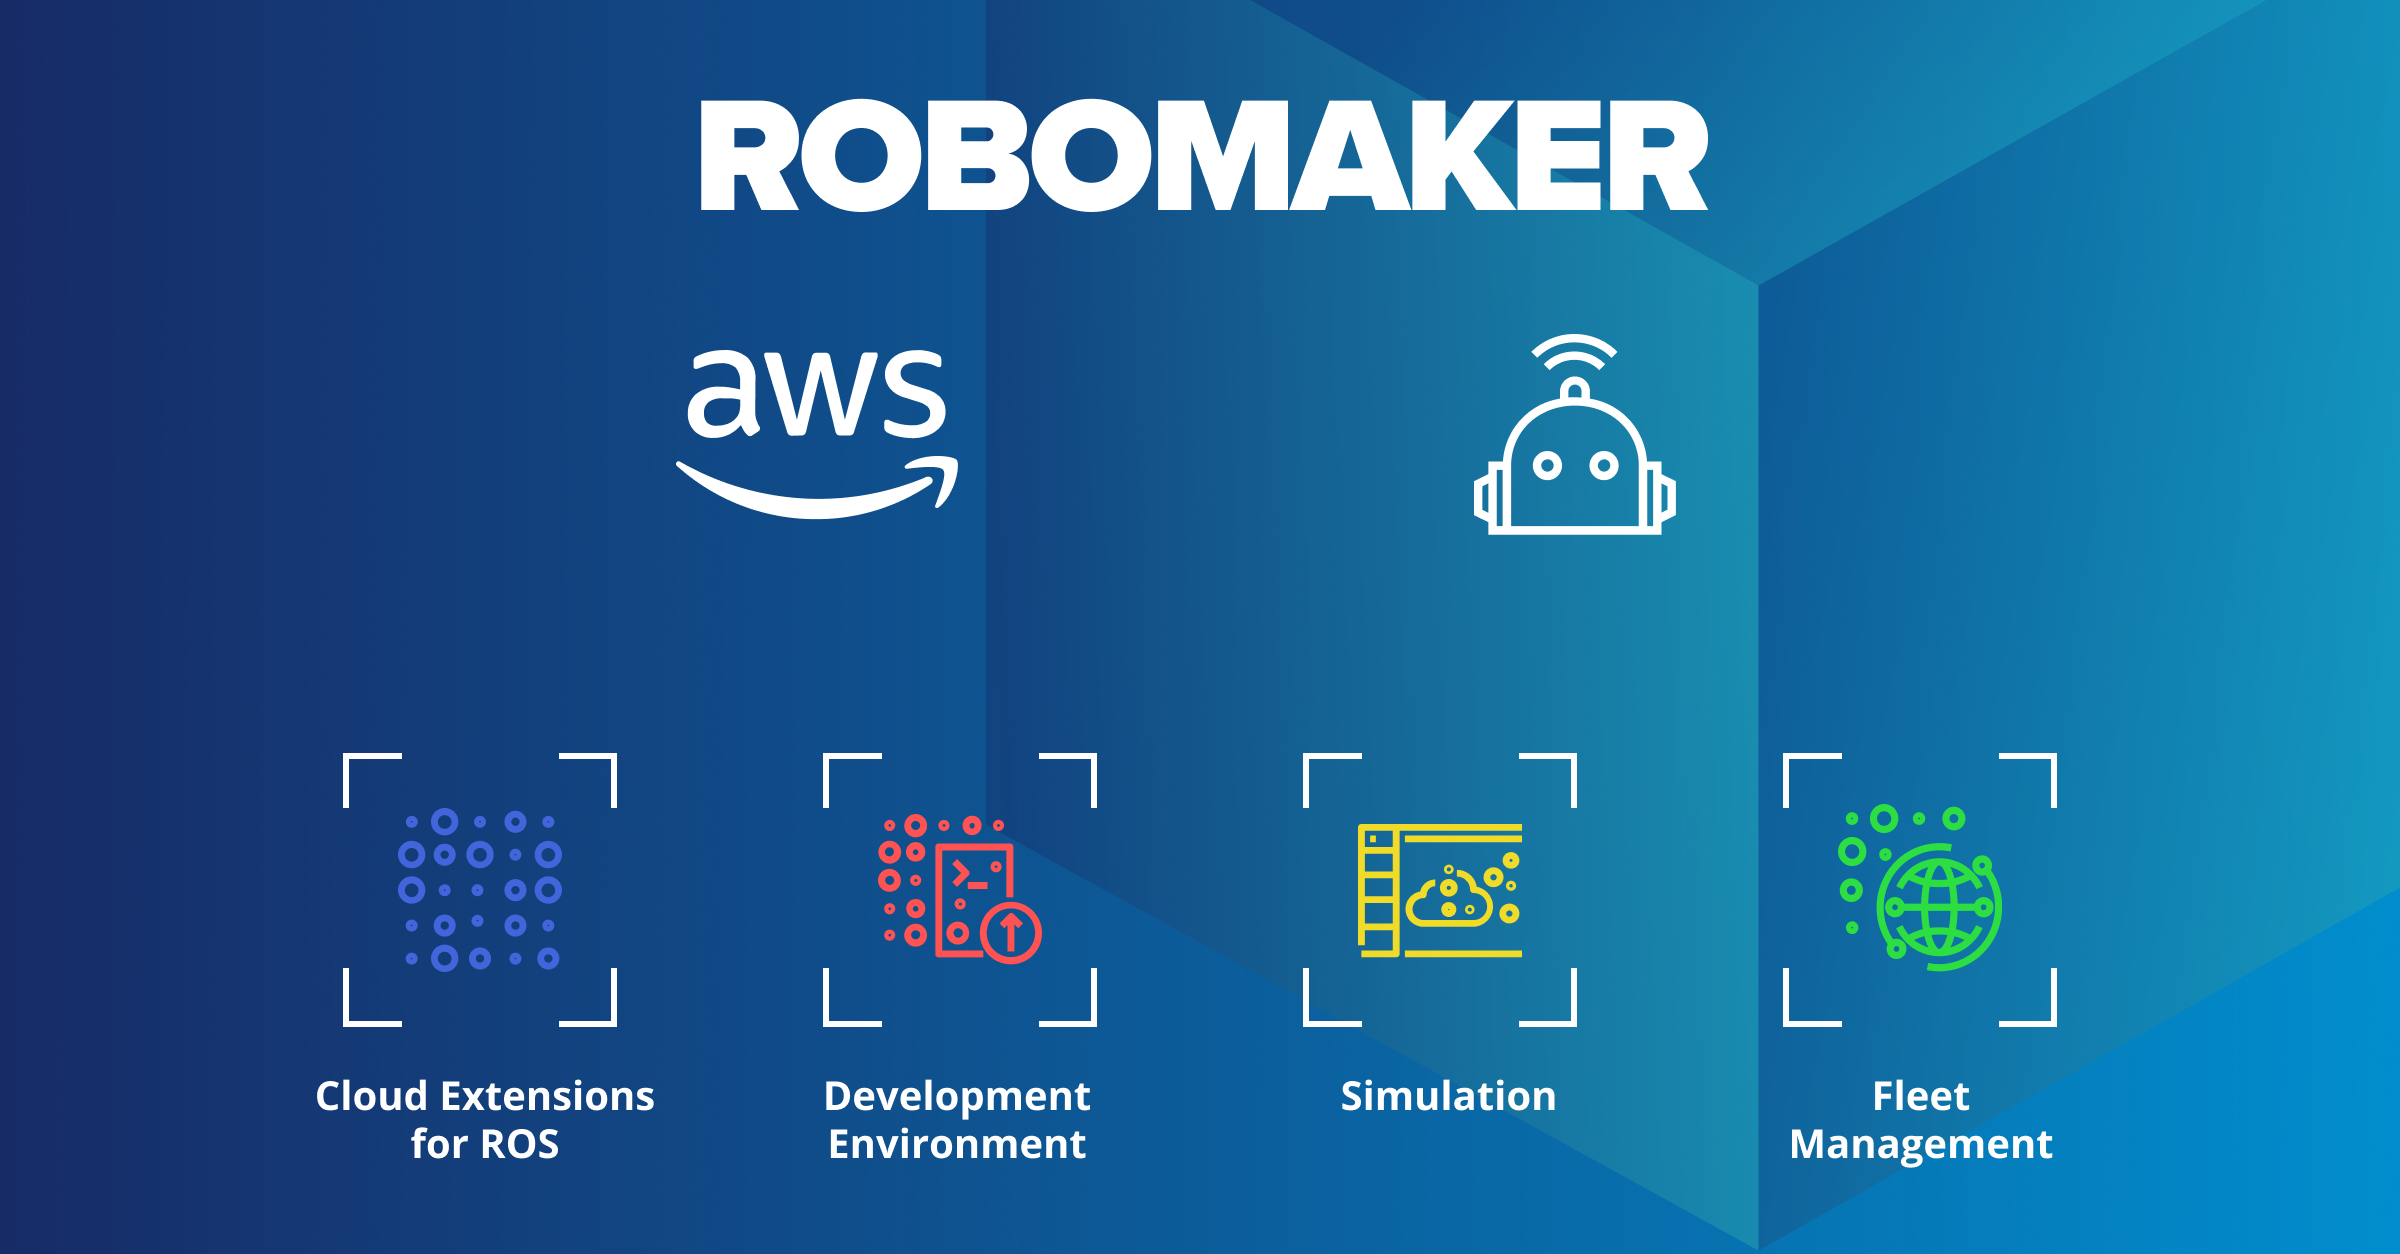
AWS has a reach environment of services that may be used for multiple advanced technology solutions: data storage and analysis, machine learning tasks, IoT etc. Recently, AWS added RoboMaker service which is aimed to help working with both standalone robots and robotics fleets. Being a Partner of AWS, SoftServe immediately started to work with this service.
The first step was to port our robot Booter to the AWS RoboMaker. This is a short description of our efforts to make it easier for you to do the same with your robot and start using AWS RoboMaker today. It demonstrates how to setup AWS RoboMaker, build code for the hardware and simulation, and deploy it to a physical robot using our ROS packages.
Before we start, let’s review how AWS RoboMaker enables enhancement of robotics solutions:
- RoboMaker is part of the AWS service family which allows storing and analyzing required data from the robot in real time
- Multiple types of robots may be added to the robotics fleet so not only can they perform a single task collaboratively, but the same algorithm may be easily deployed on different kinds of robots
- There is no need of performing heavy computations on-premise as the environment model paired with the robot model may be stored online and the simulation can be performed in the cloud
- RoboMaker enables easy setup of robotic environment and data streaming using its IDE, and supports test and deployment of the solution
Market influencers are deeply involved in development of both proprietary and opensource solutions, therefore ROS and ROS2—with cloud platforms—will shape the future of robotics.
Greengrass Setup
To deploy a robot application to the physical robot Booter, AWS IoT Greengrass setup is required. For our robot, we're using Raspberry Pi, so Greengrass should be installed according to the AWS IoT Greengrass guide on Setting Up a Raspberry Pi.
We have to setup and download Greengrass credentials, upload AWS IoT Greengrass core software to Raspberry Pi (use armv7l for Raspbian.
It's convenient to register Greengrass as an OS service as follows: File greengrass.service _le can be found inside the Booter repository aws_robomaker branch. We plan to open source this repository soon, but if you want to get access earlier, please contact us.
1 [ Unit ]
2 Description = Greengrass Daemon
3
4 [ Service ]
5 Type = forking
6 PIDFile =/ var /run / greengrassd . pid
7 Restart =on - failure
8 ExecStart =/ greengrass / ggc / core / greengrassd start
9 ExecReload =/ greengrass / ggc / core / greengrassd restart
10 ExecStop =/ greengrass / ggc / core / greengrassd stop
11
12 [ Install ]
13 WantedBy =multi - user . target
RoboMaker Setup
We use a development environment from RoboMaker for easy setup, although everything here can be achieved by using AWS CLI, docker image for Raspberry Pi armhf compilation, and docker image for x64 simulation for compilation.
Development Environment, Robot & Simulation Applications Setup
First, we’ll create the development environment, and then we can start building bundles for robot and simulation applications. Instructions how to build the armhf bundle for robot application can be found here. Another way is to clone Booter git repo on 'aws robomaker' branch, do everything local and upload bundles using AWS CLI (similar procedure can be used on any robot).
Follow these steps:
STEP 1. Prepare both robot and simulation workspaces for future work:
1 # Repository is private , please reach our management for the access
2 git clone -b aws_robomaker \
3 https :// github .com/ SoftServeSAG / catering_robot_ros . git
4
5 mkdir -p cr2_robot_ws /src
6 mkdir -p cr2_simulaiton_ws /src
7
8 cp -r \
9 catering_robot_ros / cr2_aws \
10 catering_robot_ros / cr2_control \
11 catering_robot_ros / cr2_description \
12 catering_robot_ros / cr2_mecanum_hw \
13 catering_robot_ros / cr2_msgs \
14 catering_robot_ros / cr2_stmencoder \
15 cr2_robot_ws /src
16
17 cp -r \
18 catering_robot_ros / cr2_gazebo \
19 catering_robot_ros / cr2_description \
20 cr2_simulation_ws / src
21
22 cd catering_robot_ros / docker / xenial / armhf
23 sudo bin / build_image . bash
24
25 cd ../ nvidia / cr2
26 ./ build .sh
STEP 2. Build robot application (armhf bundle) for raspberry as follows:
1 cd cr2_robot_ws
2 docker run -v $( pwd ):/ ws -it ros -cross - compile : armhf
3
4 # Inside docker
5 cd ws
6 apt update
7 rosdep install --from - paths src --ignore - src -r -y
8 colcon build \
9 --build - base armhf_build \
10 --install - base armhf_install
11 colcon bundle \
12 --build - base armhf_build \
13 --install - base armhf_install \
14 --bundle - base armhf_bundle \
15 --apt - sources - list / opt/ cross /apt - sources . yaml
16 exit
STEP 3. Build robot application (x64 bundle) for simulation:
1 cd cr2_robot_ws
2 docker run -v $( pwd ):/ ws -it cr2
3
4 # Inside docker
5 cd ws
6 apt update
7 rosdep install --from - paths src --ignore - src -r -y
8 colcon build \
9 --build - base x64_build \
10 --install - base x64_install
11 colcon bundle \
12 --build - base x64_build \
13 --install - base x64_install \
14 --bundle - base x64_bundle
15 exit
STEP 4. Build the simulation application (simulation bundle):
1 cd cr2_simulation_ws
2 docker run -v $( pwd ):/ ws -it cr2
3
4 # Inside docker
5 cd ws
6 apt update
7 rosdep install --from - paths src --ignore - src -r -y
8 colcon build \
9 --build - base x64_build \
10 --install - base x64_install
11 colcon bundle \
12 --build - base x64_build \
13 --install - base x64_install \
14 --bundle - base x64_bundle
15 exit
STEP 5. Upload the bundles to S3 as follows:
1 aws s3 cp cr2_robot_ws / armhf_bundle / output . tar \
2 s3 ://{ bucket - name }/ cr2_robot . armhf .tar
3
4 aws s3 cp cr2_robot_ws / x64_bundle / output . tar \
5 s3 ://{ bucket - name }/ cr2_robot . x64 . tar
6
7 aws s3 cp cr2_simulation_ws / x64_bundle / output . tar \
8 s3 ://{ bucket - name }/ cr2_simulation . x64 . tar
Fleet
To deploy packages, we have to create fleet, register our robot in fleet, and configure policies and roles. To test our solution on a real robot—use full access policies for the IAM role created with links provided before (AmazonS3FullAccess, AWSRoboMakerFullAccess, CloudWatchFullAccess). After successful deployment we can change those policies to safer ones.
Launch
Simulation
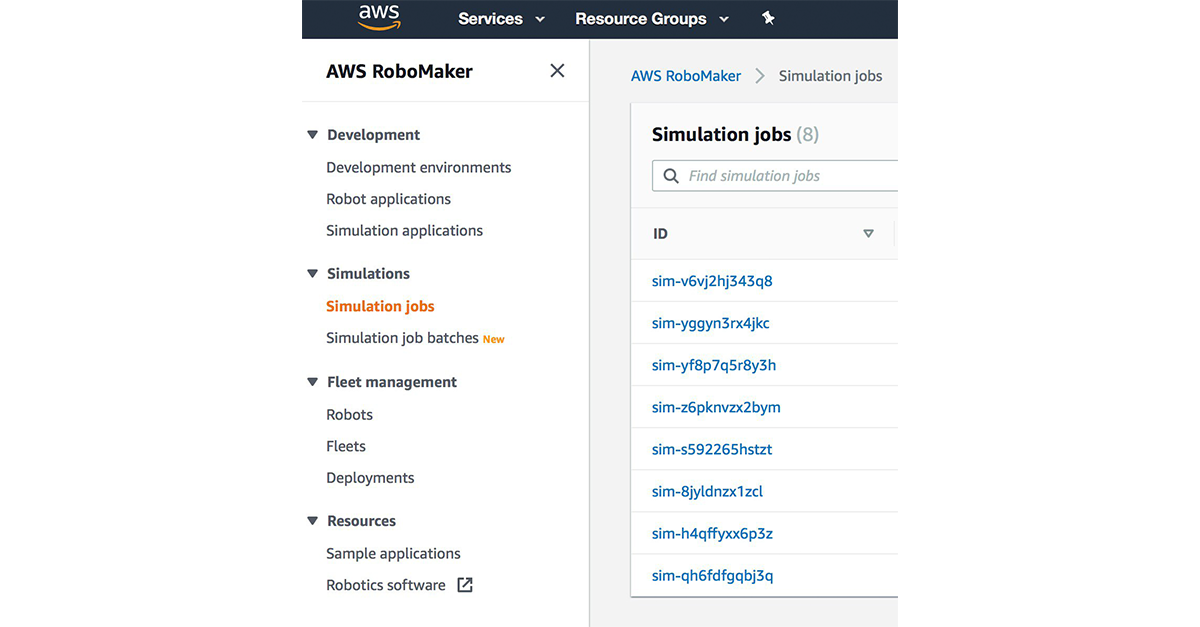
To launch simulation in RoboMaker we have to create simulation job, on 'Simulation Job' page (see Figure 1)
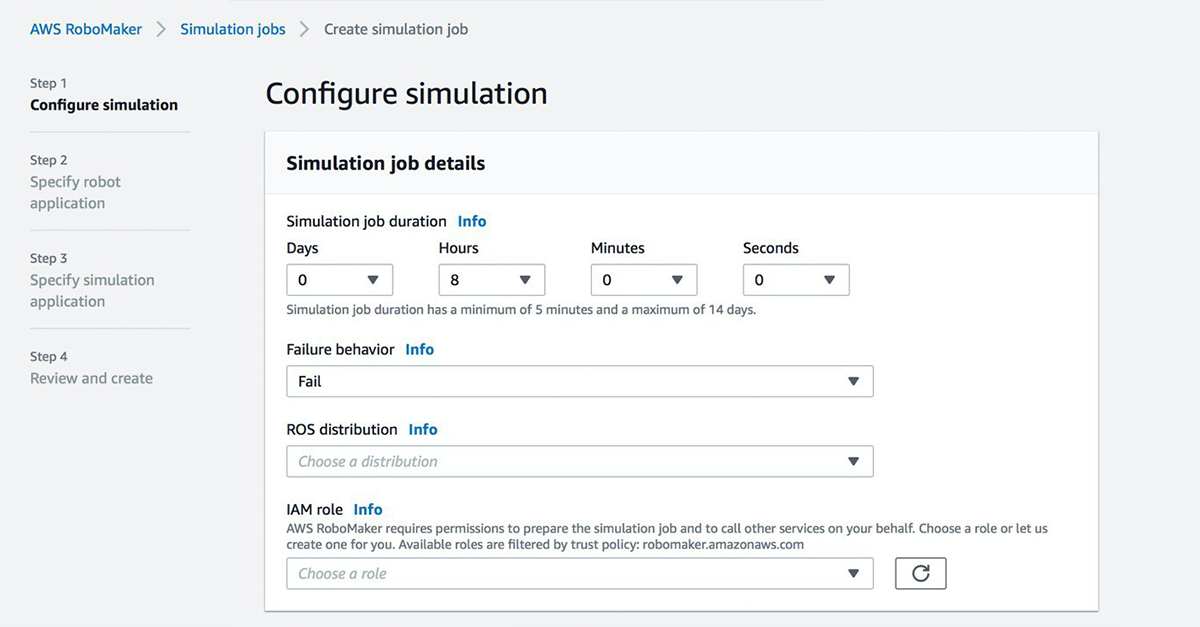
Next, we choose ROS distribution, Gazebo version (see Figure 2), network, previously built bundles (with x64 suffix) for robot and simulation applications, and launch _les which will be launched on start:
- Robot application. Package: cr2_bringup, launch _le: cr2_bringup_sim.launch;
- Simulation application. Package: cr2 gazebo, launch _le: HQ.launch;
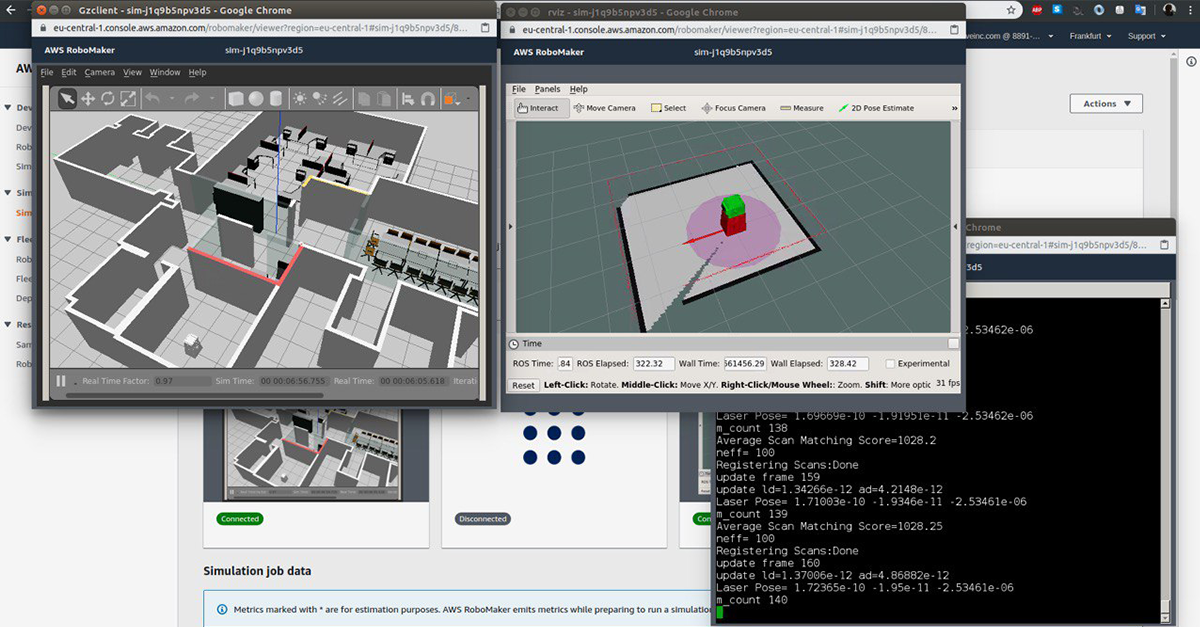
Once we completed the steps above and the simulation job started, we see our environment with the robot Booter up and running, ready to navigate (see Figure 3).
Hardware
There are two options to deploy an armhf bundle to a real robot:
- Use deployment tab on RoboMaker page (similar to Simulation section);
- Copy bundles locally via ssh or external storage devices;
Utilization of the deployment tab proved to be too lengthy and it is sometimes interrupted by strange errors. In case we want to locally copy bundles (which is much faster if we're testing something) we have to copy cr2 robot.armhf.tar bundle to Raspberry Pi, extract it, and launch bringup launch _le. Additionally, Greengrass service must be stopped. To do this, one has to use the following code to bring-up on Raspberry via ssh:
1 # ROBOT_IP must be set
2 scp cr2_robot . armhf . tar pi@ROBOT_IP :/ home /pi/ Downloads
3 ssh pi@ROBOT_IP
4
5 # Raspberry Pi
6 sudo service greengrass stop
7
8 cd / Downloads
9
10 tar xvf cr2_robot . armhf . tar
11 mkdir dependencies
12 tar xvzf dependencies .tar.gz -C dependencies
13 mkdir workspace
14 tar xvzf workspace . tar .gz -C workspace
15
16 export BUNDLE_CURRENT_PREFIX =$( pwd )/ dependencies
17 source $( pwd )/ dependencies / setup .sh
18 export BUNDLE_CURRENT_PREFIX =$( pwd )/ workspace
19 source $( pwd )/ workspace / setup .sh
20
21 # ROBOT_IP must be set
22 export ROS_IP = ROBOT_IP
23 roslaunch cr2_bringup cr2_bringup . launch
/{ bucket - name }/ cr2_simulation . x64 . tar
Additionally, we added cloud watch (logs and metrics) to perform analysis in real time (for additional information visit Amazon Cloud Watch tutorial).
This allows us to start monitoring our robot sensors almost in real time. The diagram below represents main components and their communication:

Conclusion
AWS RoboMaker has great potential in the future. It's straightforward to set up and use currently supported services including CloudWatch, CloudMetrics, etc. By following the instructions shared here, you can have a working robot with online monitoring tools already built by Amazon (see Figure 4 of the architecture).
Since AWS RoboMaker is a pretty new technology, we expect you might have questions – please contact us and we are ready to help.