

In our previous blog, we discussed general topics related to Zephyr RTOS. In this article, we will delve deeper into Zephyr and its application development process.

The Best of Linux
As a Linux Foundation project, Zephyr naturally inherits the best development features and tools from Linux, including:
- A developed infrastructure for compiling existing platforms with simple extension tools
- A powerful driver development tool based on the device tree structure approach
- Flexible and orthogonal configuration options
- Easy integration with IDEs and Python, along with a powerful command-line tool (West)
- A POSIX-compatible API
Getting started
To begin application development, follow these steps:
- Install CMake version 3.13.1 or higher.
- Install West.
- Run the west init [target directory] command.
- Navigate to the [target directory], and then run west update.
After running the last two commands, the latest Zephyr OS repository will be located in the target directory. To complete the setup, you must download and install Zephyr’s Software Development Kit (SDK). Additionally, you will need to configure the appropriate environment scripts and execute them.
Application development. Standard boards
Zephyr’s base directory contains its source code, kernel configuration options, and build definitions. While it can reside anywhere, its location is determined by the west update command, where the [target directory] for Zephyr’s code is specified. To ensure the application recognizes this location — as well as other configuration parameters — you must run the zephyr-env.sh script located in Zephyr’s root directory before building the application.
At a minimum, Zephyr’s application folder (app) must include the following files:
- CmakeLists.txt
- prj.conf
- Kconfig
- src/*.c
As a result, the binary image will be built and stored in an automatically created build/zephyr folder.
Build control
The Zephyr build system is highly flexible and utilizes many variables.
The most commonly used variables are ZEPHYR_BASE, BOARD, and DTC_OVERLAY_FILE. These can be provided to the build system in various ways: as parameters to the west command, as environment variables, or as statements in the CMakeLists.txt file.
Build stages
The Zephyr build process consists of two main stages: configuration and build.
Configuration stage
Driven by CMake, this stage is quite complex and involves numerous files throughout the Zephyr hierarchy.
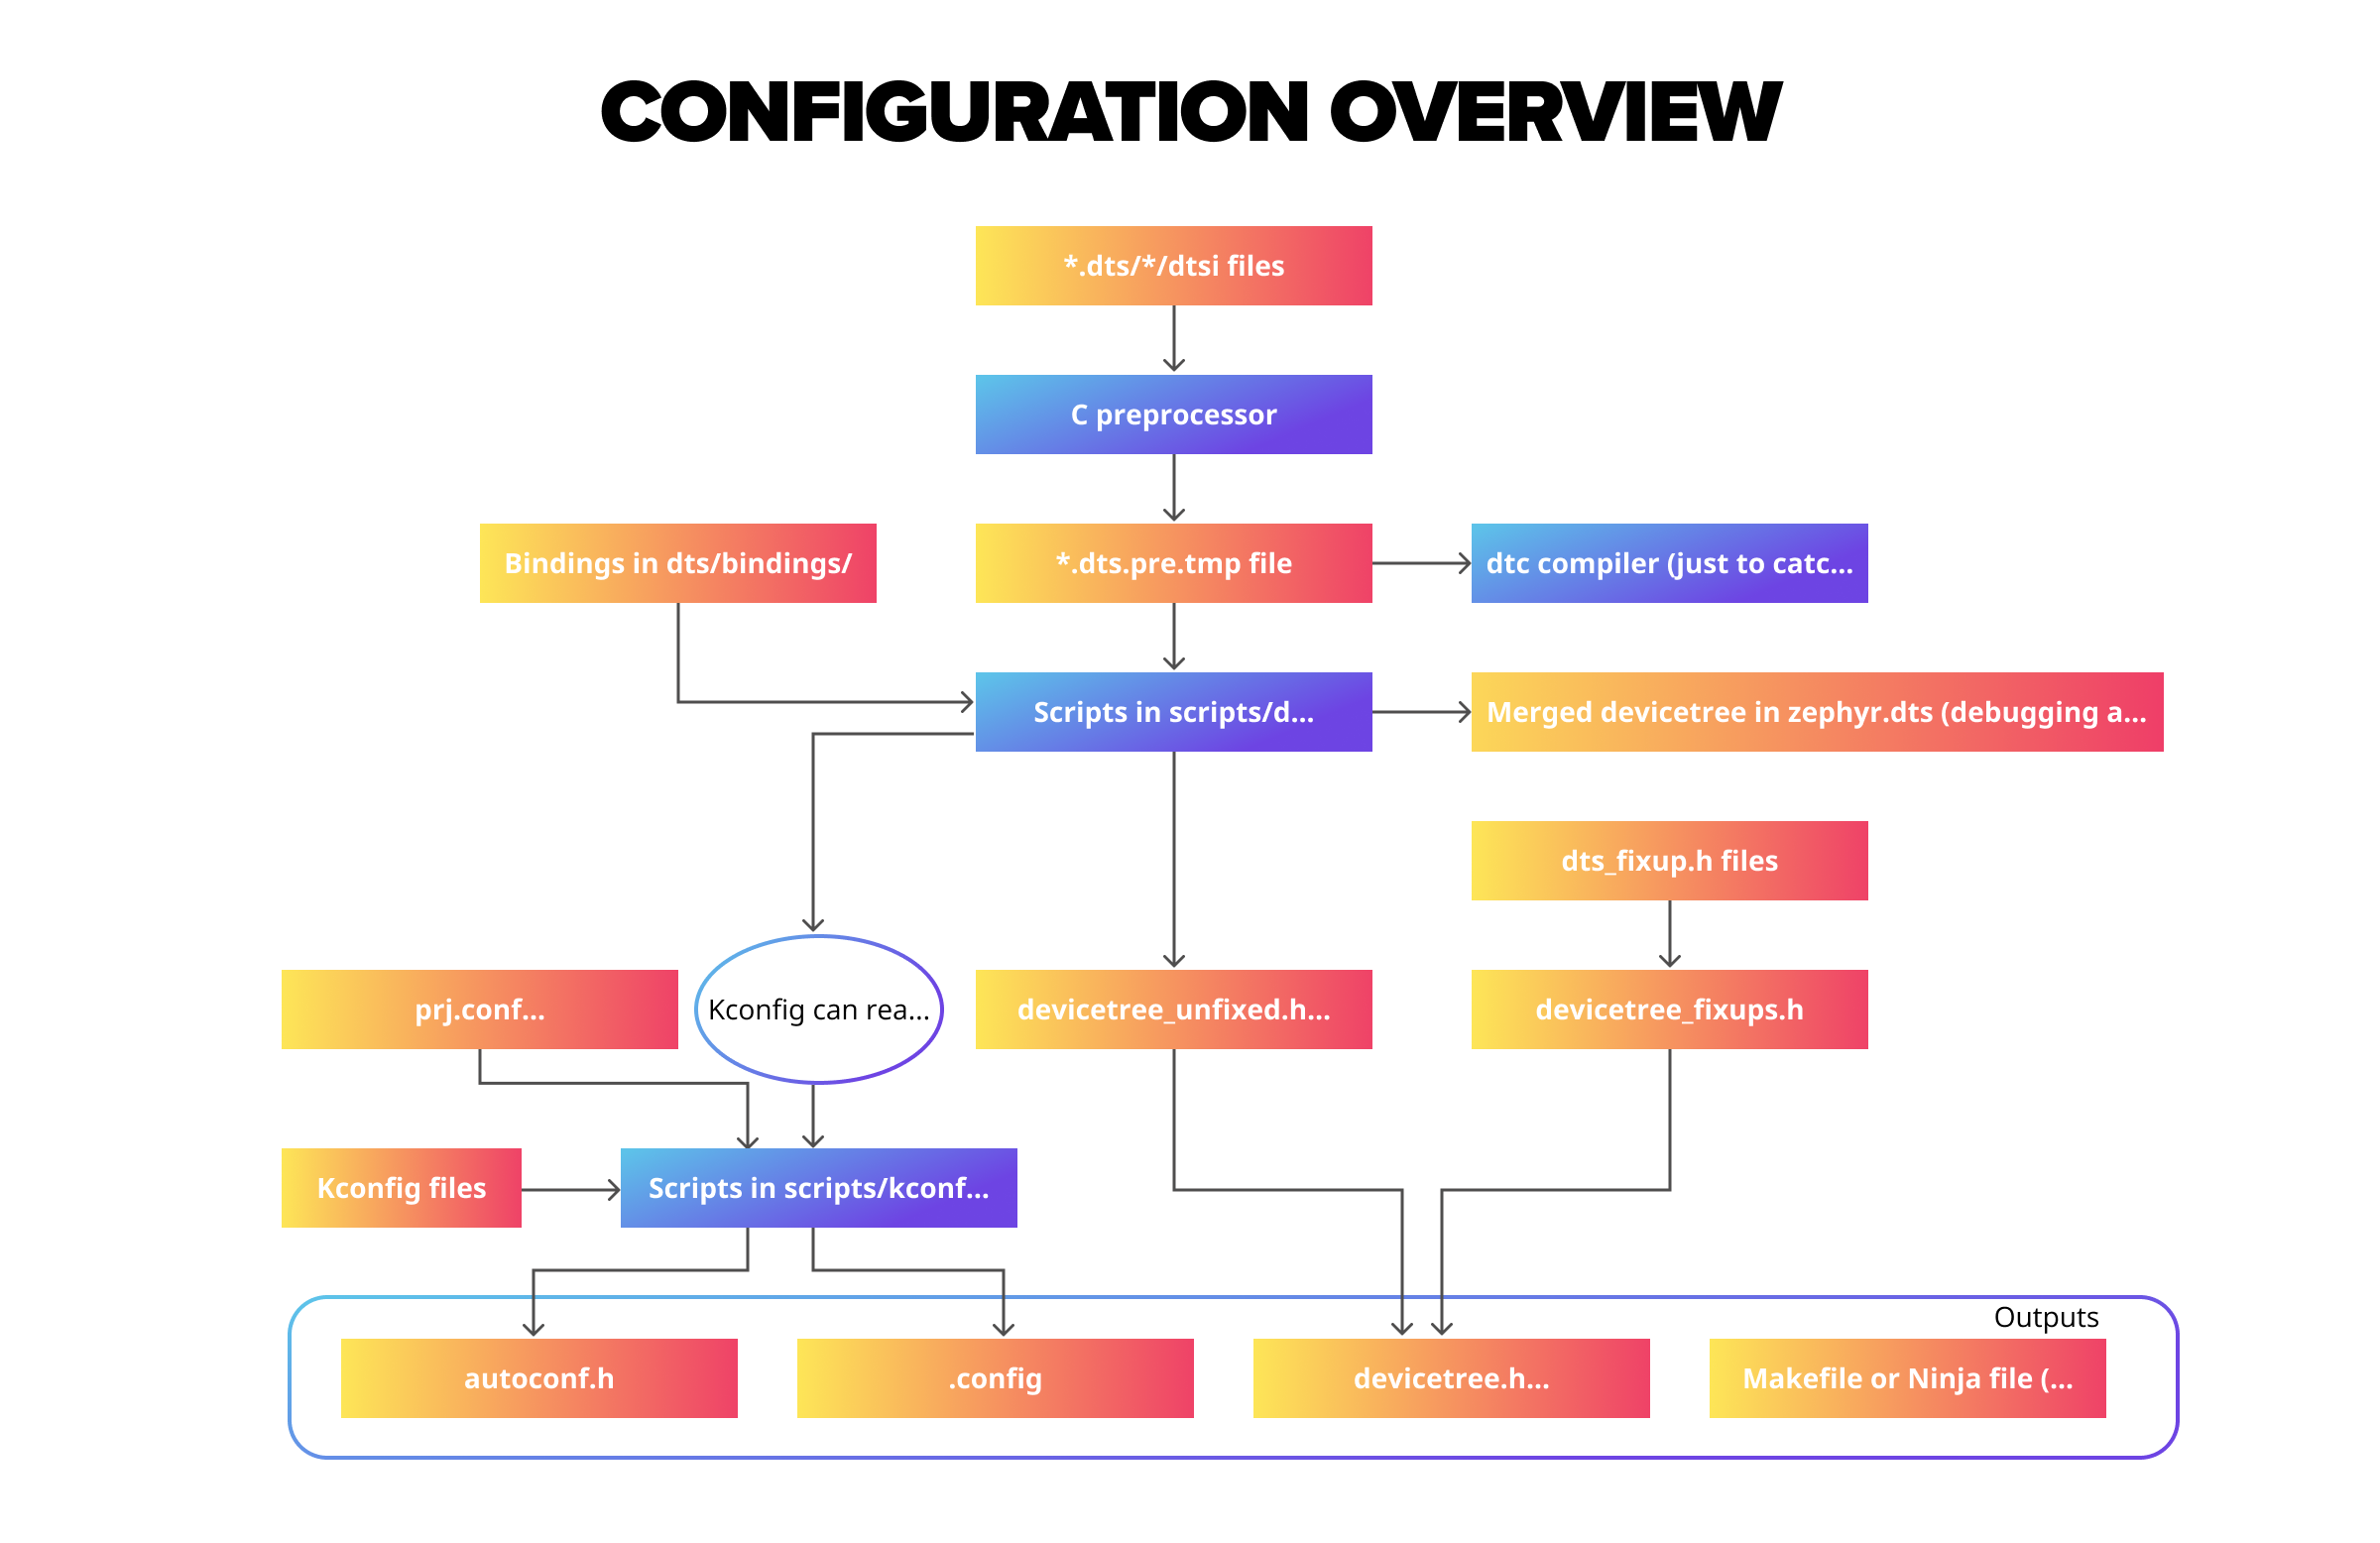
Build stage
Driven by Make (or Ninja), this stage can be divided into two sub-stages: pre-build (first) and final (second).
- Pre-Build Stage:
At this principal stage, source files from various subsystems are included in the build, depending on the configuration settings made during the previous stage. These files are compiled into archives with references to header files in the tree. Header files generated during the configuration phase are also included. At this stage, the binary zephyr_prebuilt.elf is generated. - Final Stage:
The final binary image, zephyr.elf, is generated during this stage. This step is necessary because, in some configurations, the binary from the pre-build stage is incomplete, containing empty placeholder sections that need to be filled. A dedicated Python script runs to gather the missing information, and the final binary is then built. More details can be found at zephyrproject.org.
Application development. Custom boards
For known boards, a device tree structure describing the board hardware is predefined and well-documented. However, the process becomes more complex when developing applications for custom boards. Fortunately, most custom boards are based on known MPUs, which simplifies the development process. To address this, Zephyr introduced the concept of device tree overlays.
Let’s review how the process works for custom hardware with environmental sensors on board:
- Enabling a Known Sensor:
Zephyr provides drivers for the vast majority of sensors. If the custom hardware includes a sensor, the Zephyr build system must be properly configured to include the sensor's functionality in the final binary image. - Adding a New Sensor:
If a sensor driver is not already implemented, the developer must manually perform the same steps Zephyr uses for known sensors.
Zephyr treats sensors as part of the hardware. As such, like all basic hardware, sensor initialization is handled as a preliminary step or at least before the application’s main function starts. If properly set up and initialized, sensors will be ready for use at the start of the application. Developers need to obtain the sensor handle using the unique sensor name and then use the sensor API functions to manipulate sensor data.
Conclusion
At first glance, Zephyr may seem challenging to work with, and using an SDK and toolchain developed for a specific SoC or MPU might appear more straightforward. However, transitioning to a different board often requires learning a new SDK and toolchain, whereas using Zephyr makes migration smoother and more flexible.
SoftServe’s R&D team stays at the forefront of technology, anticipating and accelerating breakthrough opportunities to address specific business needs.
We’d love to hear about your experiences with Zephyr and where you are on your enterprise digital journey.
Start a conversation with us